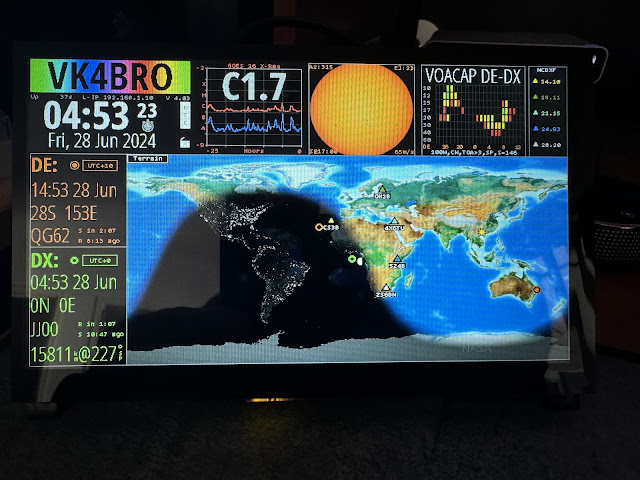
HamClock
So I saw Jim W6LG post a video on YouTube about a cool little HamClock kit from inovato based on a small Quadra PC. Watching the video - it looked like quite a cool little addition to the shack. Reading the comments on the video and having a look at the product page I learned HamClock is a standalone open source application that will run on a multitude of platforms.
I love ordering new hardware as much (maybe more?) than the average nerd, however I reaslied I have a drawer full of Raspberry Pi's and other single board computers. Given the low hardware specs required for this I figured I'd dig out a Raspberry Pi 3 and give it a go. While HamClock once running does offer up a remote view/screen, I really liked the idea of having a little dedicated screen on my bench with this display. I did some googling and came across what looked like the perfect little option - Freenove 7 Inch Touchscreen for Raspberry Pi, 800x480 Pixel IPS Display, Driver-Free. I clicked order and waited for the package to arrive. In the meantime, I imaged an SD card with a fresh copy of Raspberry Pi OS (64bit, bookworm) and dug out a heatsink and stuck it on.
The screen arrived quickly and was packaged really well:
The screen comes with all the mounting hardware, cables and some little feet so it stands upright, as well as some very clear instructions on how it all screws together. The Raspberry Pi just mounts to the back of the screen on some little stand offs - and the screen uses a pair of pogo pins to grab power from the Raspberry Pi - which I thought was a very cool little trick:
Some of you will have noticed a little USB receiver in the shot above, I have a Logitech Keyboard and mouse that support up to three devices - so I'm using a Logitech receiver here so I can just flick my existing keyboard and mouse over (in addition to the touchscreen). All that is left is power and network. While I could have simply used a 5V 2.5A micro USB, and either a network cable or wifi - I thought I'd take advantage of the fact I already have Power Over Ethernet or PoE on my bench and bought one of these adapters from my local jaycar:
And with that I plugged it in to a single ethernet cable and watch it boot up!
No drivers or config were required for the screen to display and the touch screen to work with the latest image I used. I ssh'd in to install some updates and do some configuration, and unfortunately after only a couple of minutes the screen started to flicker so badly I couldn't read what it said. I tried reseating cables, different cables, external power for the pi and the screen, and even a different Raspberry Pi (handy having a few!), but the result was the same. I'd just got a dud screen:
I jumped onto Amazon and my only option was a return for credit. I didn't want a credit - I wanted another screen. I thought I'd email support@freenove.com directly with some pictures and a video to see if they could help. They responded within a couple of hours and asked for my details to send out a replacement screen - huzzah! This one did ship from China - so it took a little longer to get here than the overnight most things with Amazon take, however a replacement was on it's way.
That replacement screen turned up today - so I quickly got to work swapping over the mounting hardware and Raspberry Pi itself, plugged it all in and watched. It booted up and looked great! I let it sit for 5-10 minutes, half expecting it to start flickering, but it's been several hours now and it's still working perfectly.
So all that was left was to install HamClock. This is as simple as following the instructions (grabbing the provided shell script, marking it as executable and running it.) From there you run through the initial configuration when you first launch the app. There are a lot of options to set and choose from, these are all covered in detail in the user guide. I now have an awesome little addition to the shack sitting on my bench with only a single ethernet cable running out of it - cool!
I did need to tell the Raspberry Pi not to turn the screen off -
- Click on the Menu button on the upper right (Raspberry Pi Icon) >> Preferences >> Raspberry Pi Configuration.
- In Raspberry Pi Configuration Window, click on Display Tab. Look for the Screen Blanking row, click Disable.
- Then click OK. A window will open and asks if you like to reboot the Raspberry Pi. Click Yes. Raspberry Pi will reboot.


Comments
Post a Comment